Share

Meet the May Flowers Kitty - a companion to our April Showers Bunny! This is a great project for crafters with minimal experience stitching three dimensional animals. Both projects can be completed at different stages for varying skill levels. For a Beginner, features can be glued instead of sewn, while Intermediate crafters can add stitched details and embellishments to suit their tastes. You can also experiment with altering the basic body to create entirely new animals! Grab your supplies and let's get started on this sweet kitty.
Skill Level: Kid Friendly to Intermediate
Time: 5 hours
Additional Supplies:
May Flowers Kitty Pattern (click to download)
Directions:
1. Print pattern above onto cardstock and cut out pieces. Trace pattern onto corresponding felt and cut.

2. Begin by stitching the inner ears and muzzle to the front body piece with one strand of matching embroidery thread and a whipstitch. Glue or stitch the nose in the center of the muzzle. For the whiskers, make three long stitches on either side of the muzzle that extend onto the cheeks.

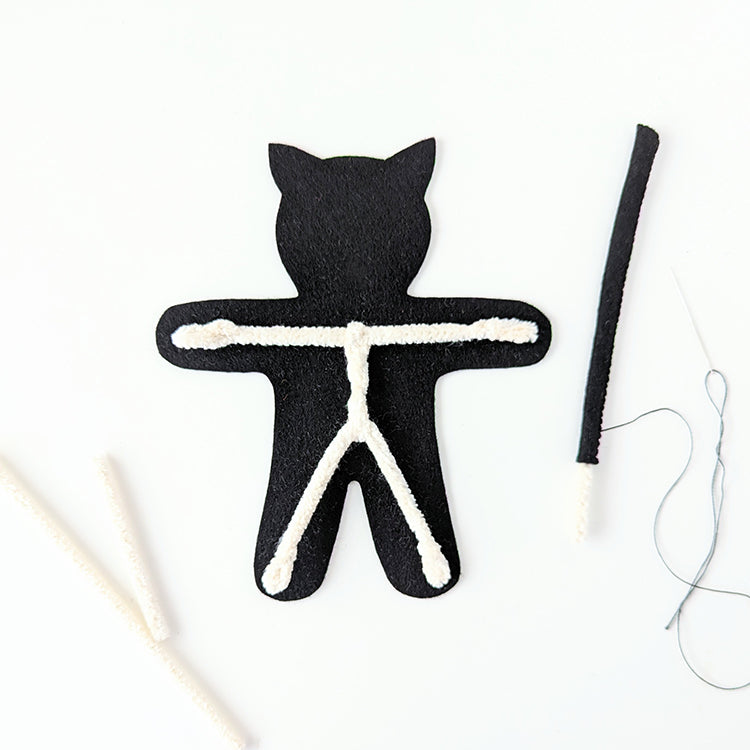
3. Cut a length of cotton pipe cleaner for the tail. Example shown is 6". Fold over one end so the wire does not poke through the felt. Cut felt for tail to be 1" shorter than pipe cleaner. Fold felt in half lengthwise and whipstitch top and side closed. Knot thread but do not cut. Insert pipe cleaner (folded end first). Set aside.

Please take great care in cutting pipe cleaners. They should only be cut with wire cutters and children should be supervised.
4. Take cotton pipe cleaners and cut and fold them to mimic the shape and size of the arms, torso and legs. Be sure to fold and wrap each end. Clip excess. Set wire form aside.

5. Cut a small slit on the back body piece for the tail. Insert tail into slit until a small amount of felt comes through. Use thread still attached to tail to stitch around the perimeter, securing tail to body. Fold pipe cleaner against the body in preparation for the next step.

6. Place the two body pieces together with right sides facing out. Whipstitch around the perimeter of the kitty beginning on the right side at the base of the neck. Move couterclockwise around the head and arm and stop underneath the left arm.

7. Stuff head with Polyfil. Add wire form and wrap tail end around the torso area to secure.

8. Continue stitching around the perimeter of the kitty body. Add stuffing to the arms and legs as you go. To ensure the wire frame stays in the center of the body, flip the body over and add stuffing from the back as well as the front. Stop stitching at beginning neck point. Knot thread and pull through body to finish.

9. To make the kitty's jumper, begin with the bow. Fold the Willow felt strip into a loop. Trim excess felt. Use extra felt to wrap around loop to form a bow. Glue onto back of jumper above split. Stitch pockets onto front of jumper.

10. Place the two jumper pieces together with right sides facing out. Whipstitch along the outer sides.

11. Slip jumper onto kitty feet first. Tuck tail into the jumper and pull out through split in back. Fold back suspenders over to the front and glue in place.

12. For the shoes, whipstich around rounded bottom edge.

13. The flowers are made using the Floral Fringe tutorial, specifically the Straw Flower. For the fringe in this project, the scalloped felt was snipped along the scallops, stopping before the straight edge.

The flowers can all be made with the Begonia felt or you can use other felt scraps for multi-colored blooms.

We hope you enjoy making this kitty... and the bunny too! After all, April showers bring May flowers. Be sure to share your makes on social media with #benziedesign.

Thanks to Camille for designing and writing this tutorial! You can follow her on Instagram @notsomodernmillie or visit her website.