Share

We love exploring new craft disciplines. Bargello, which has existed for centuries, is having a huge renaissance in the craft world. We knew that Maker Team member Penny of @happystitchery would give you a wonderful introduction. Are you ready to learn something new today?
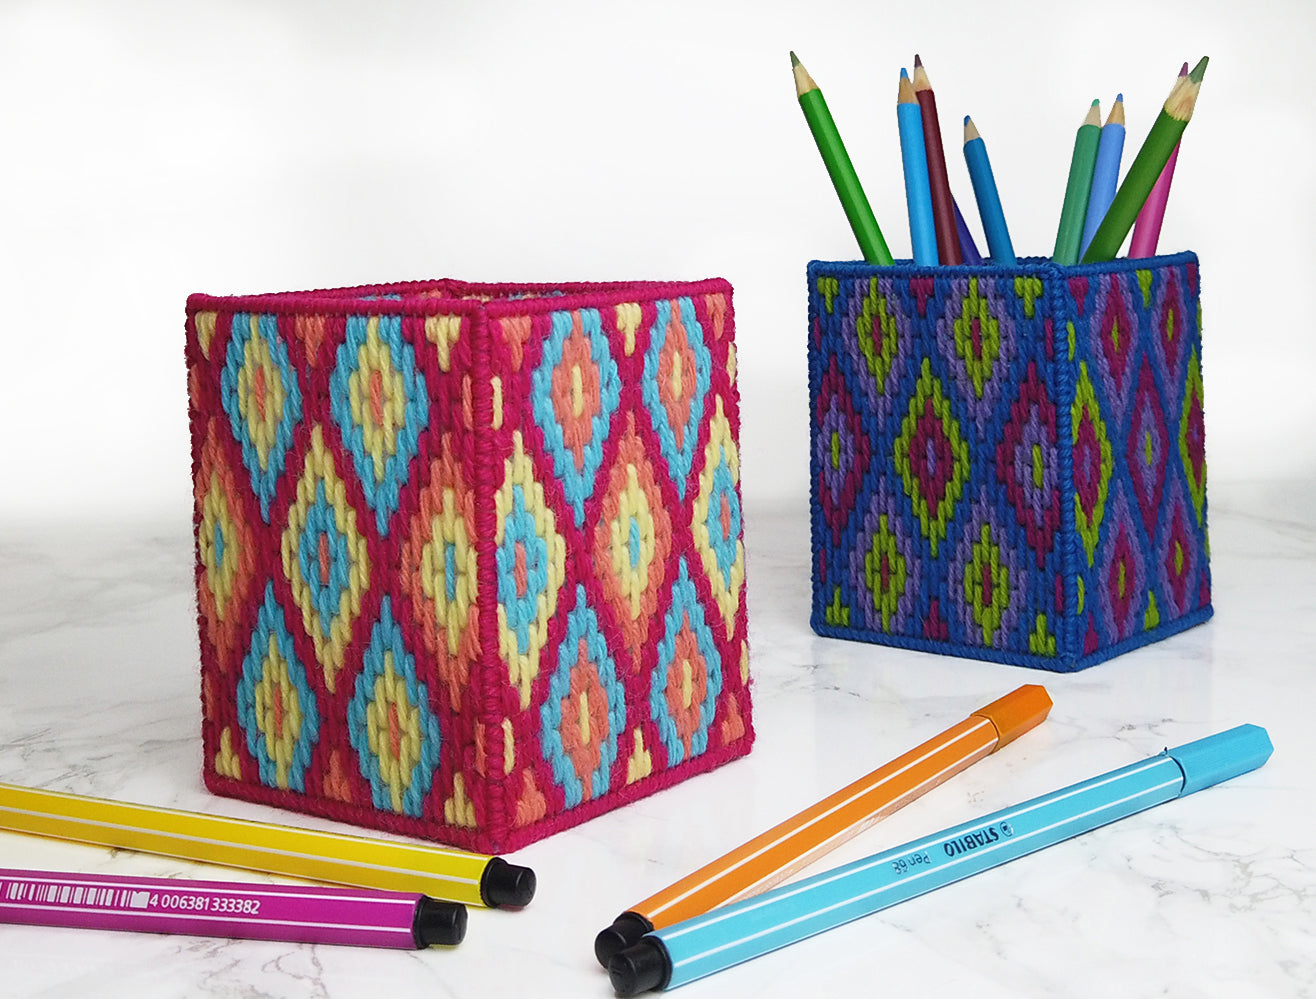
Organize all of your crafting tools with this fun and colorful geometric Bargello pencil pot. Are you new to Bargello? Don’t worry, Bargello is a simple vertical up and down stitch that is super easy to learn and suitable for all skill levels and ages. Swap to a plastic needle to make this project kid friendly!
Skill Level: Kid Friendly, Beginner
Time: 3 hours

Supplies:
Plastic Canvas, 10 count
Tapestry Needle
One skein of DMC Tapestry Wool 7861
One skein of DMC Tapestry Wool 7435
One skein of DMC Tapestry Wool 7740
Two skeins of DMC Tapestry Wool 7600
Scissors
Embroidery Scissors
Needle Threader (optional)
Bargello Pattern
Directions:
1. Start by cutting your plastic canvas into four pieces that measure 29 x 37 holes and one piece measuring 29 x 29 holes. These pieces will make the sides and base, with your finished pencil pot measuring approximately 4" in height and 3" in width and depth.

When you print out the PDF pattern, you’ll find that the pencil pot panels are comprised of two designs. You’ll be making two of each and stitching them together to form an overall alternating design.
2. The Bargello stitch is a simple vertical stitch that within this pattern is either 5 or 3 stitches in height. The pattern is on a grid, so it’s easy to count the length of these stitches as you go. Let’s get stitching!

3. Thread the tapestry needle with the first color of tapestry wool (DMC 7600). Hold your rectangle of canvas so the shorter ends are at the top and bottom. Start in the bottom left hand corner and make a 5 height stitch, then go into the next column to the right to make your second stitch 3 stitches up from the bottom and repeat by stepping your stitches all the way to the top of the canvas ending with a 3 height stitch. I told you it was easy!

4. To keep the inside of your pencil pot nice and tidy, avoid making knots and instead bring the tails of the wool underneath the stitches you have just made.

5. Once you have the first color finished on your panel, it’s time to add your next color (DMC 7861). It becomes easier at this point as you can use your existing stitches as a guide. Once you have finished your second color, your third color (DMC 7435) can be added and then all you’re left with is the blank spaces to add your last color.

6. After your last color (DMC 7740) has been stitched, your first panel is now complete. Repeat steps 3-5 to make a second identical panel. Now you have completed both panels featuring Design 1.

7. Design 2 is very similar to the panels you have just made, but with a couple of the colors alternated. Once you have stitched two panels following Design 2, it is time to construct your pencil pot.

8. Take one of each design and whip stitch them together using DMC 7600 along the longer side of the panel. Take the next two panels and do the same. Whip stitch all the panels together. You should now have one long piece featuring all four panels with alternating designs.

9. Bend the panels around until you have a kind of cube with your stitched design on the outside. Whip stitch the opening together. Whip stitch along the top edge of your pencil pot.

10. Whip stitch the last piece of plastic canvas to the bottom section to form the base and your pencil pot is finished. Yay!

This is a great project to show your creative flair by picking your own color palette from Benzie’s tapestry wool collection. I hope you had fun making this pencil pot for your crafting tools and that you enjoyed this introduction to the world of Bargello.

Thanks to Penny for designing and writing this tutorial! You can follow her on Instagram @happystitchery or visit her website. Stay tuned for more tutorials from the Benzie Design Maker Team!


